DPI Analyzer – Measure Your Real Mouse DPI Instantly
Whether you’re a competitive gamer chasing pixel-perfect aim, a graphic designer who needs precise cursor control, or someone who simply suspects their mouse’s sensitivity button has stopped working, this DPI analyzer gives you the answer instantly. Move your mouse a set physical distance, and the tool calculates your real mouse DPI in real time. No software to download. No account to create. Just open it, measure, and know.
Unlike the DPI value printed on your mouse box or displayed in manufacturer software, your actual measured DPI can differ by 5–10% due to sensor variance, mouse pad surface friction, and firmware interpolation. This online DPI analyzer tool shows you the truth, not the marketing claim. And if your mouse is misfiring clicks on top of all this, our double click test can catch that separately.
Pixels moved
0
px
Actual DPI
—
dots/in
Distance
5
in
Drag the dot across your mousepad the set distance, then release
How to Use the DPI Analyzer Tool
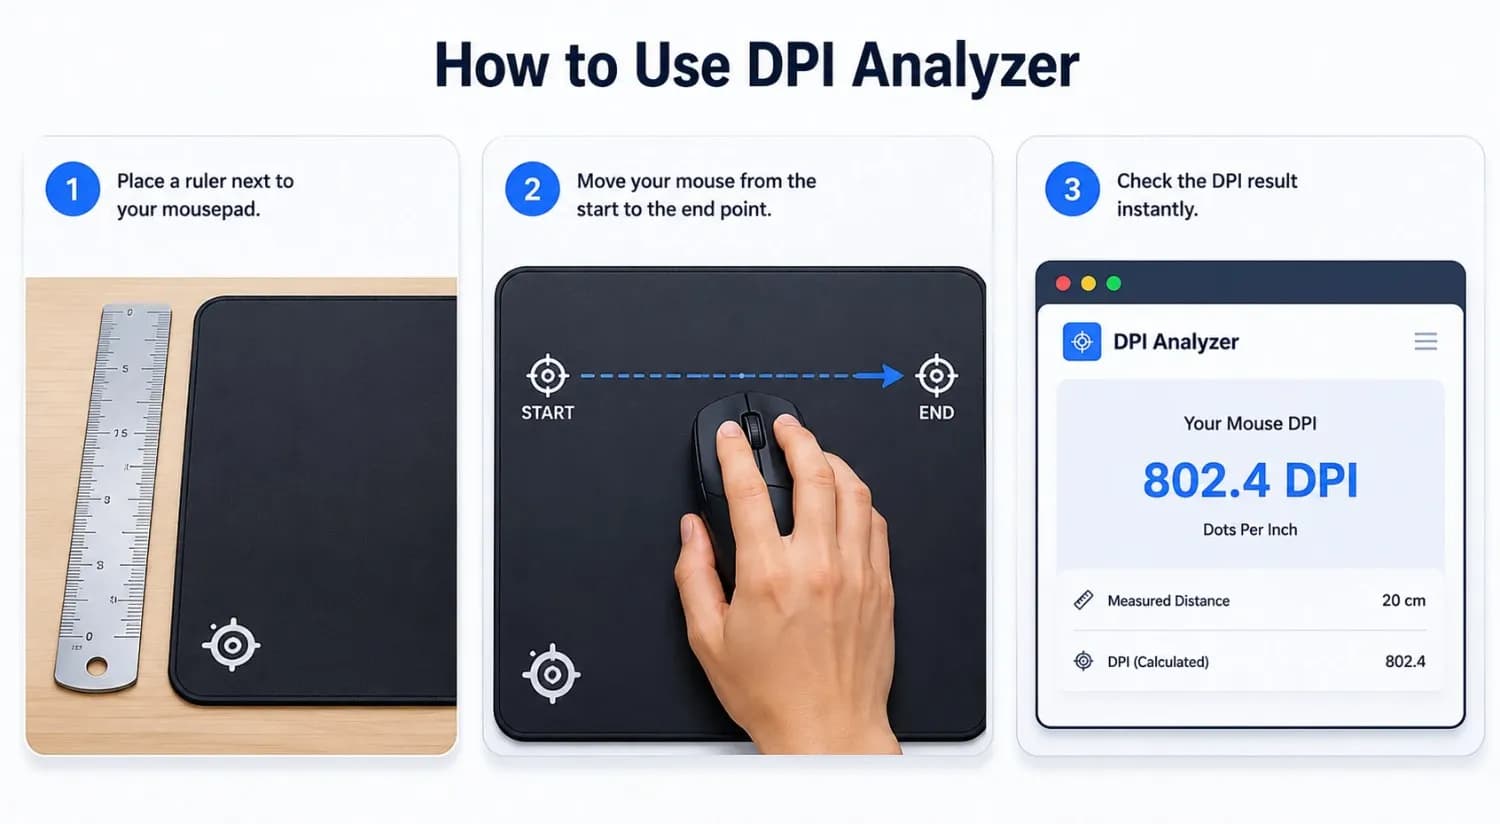
Using this online DPI analyzer takes less than 60 seconds. Follow these steps for an accurate result:
Step 1: Disable Windows Pointer Acceleration
Before testing, you must turn off Windows pointer acceleration. This is the single most important prerequisite for an accurate reading. Standard browser mouse listeners capture OS-level cursor coordinates, if acceleration is active; your mouse will report faster pixel counts when you move quickly and slower counts when you move slowly, producing a false DPI result every time.
On Windows 10 and 11:
- 1.Press the Windows key, type Mouse Settings, and press Enter.
- 2.Click Additional mouse settings (on the right side, or under Related Settings).
- 3.In the Mouse Properties window, click the Pointer Options tab.
- 4.Under Motion, uncheck the box labelled Enhance pointer precision.
- 5.Click Apply, then OK. You can re-enable it after testing if you prefer it for daily use.
On macOS:
- 1.Click the Apple menu in the top-left corner and open System Settings (or System Preferences on older macOS).
- 2.Select Mouse from the sidebar.
- 3.Set the Tracking Speed slider to the middle position as a neutral starting point.
- 4.For full raw tracking without macOS acceleration, install the free utility LinearMouse. Open it, select your mouse, set Pointer to Linear, and acceleration to Off. This gives 1:1 tracking behavior matching Windows with pointer precision disabled.
Step 2: Select your distance to measure
Select a distance you can measure accurately, 10 cm, 15 cm, or 5 inches are good choices. Use a ruler placed along the edge of your mouse pad. A longer distance reduces the margin of human error significantly. If you do not have a ruler, the lid of a standard gaming mouse box works as a consistent 11–12 cm guide.
Step 3: Run the Test
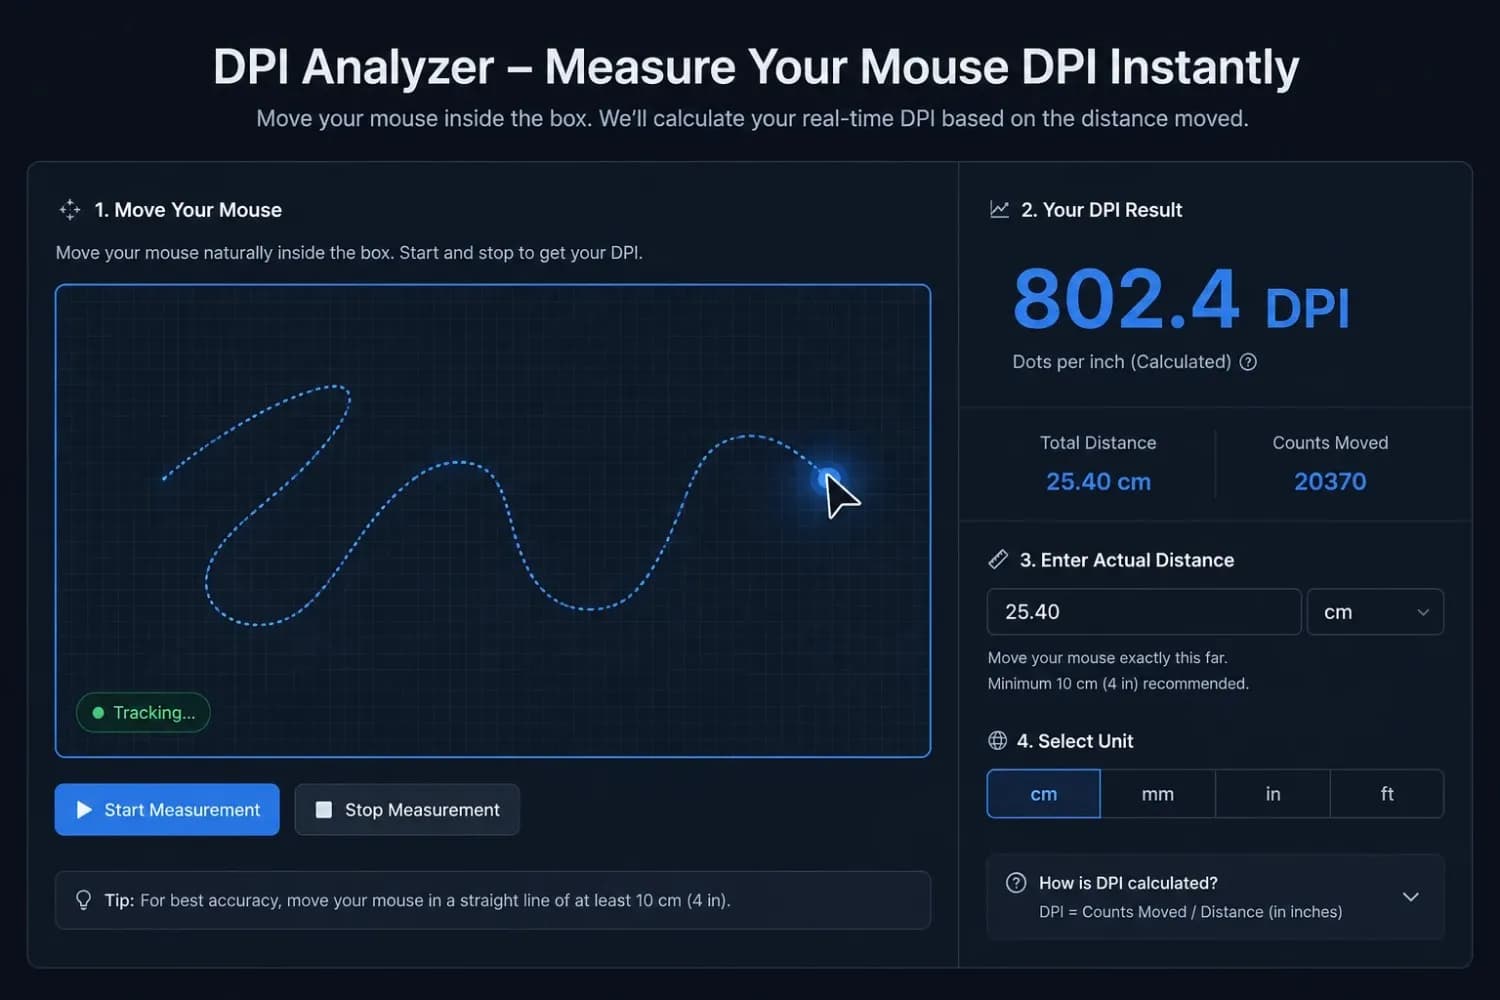
Select your distance and unit (inches, centimeters, or millimeters) in the tool. Click and hold anywhere inside the measurement area. Move your mouse in a straight line across the exact distance you set. Release. Your real DPI appears instantly.
Step 4: Repeat for Accuracy
Run the test 3–5 times and note the average. Most gaming mice report DPI in multiples of 50, if your result is 788 when targeting 800 DPI, that is a normal and acceptable deviation within sensor tolerance. A result of 425 when targeting 400 DPI, however, indicates a 6%+ variance worth adjusting for in-game.
What Is a DPI Analyzer?
A DPI analyzer is a browser-based tool that measures the actual sensitivity of your mouse by calculating how many pixels your cursor moves for every physical inch you move the mouse across a surface. DPI stands for Dots Per Inch, a figure that represents how sensitive your mouse sensor is to physical movement.
The mouse DPI analyzer works differently from simply reading the DPI from your mouse software. It measures what your sensor is actually doing, not what the firmware says it should do. You set a known physical distance (using a ruler or the edge of your mouse box), move your mouse exactly that distance, and the tool counts the pixels your cursor traveled. The math gives you your real DPI.
This matters because sensor hardware, mouse pad texture, lift-off distance, and firmware layers can all shift your real DPI away from the advertised figure, sometimes by as much as 5–10%.
Why Your Real Mouse DPI Differs From the Advertised Number
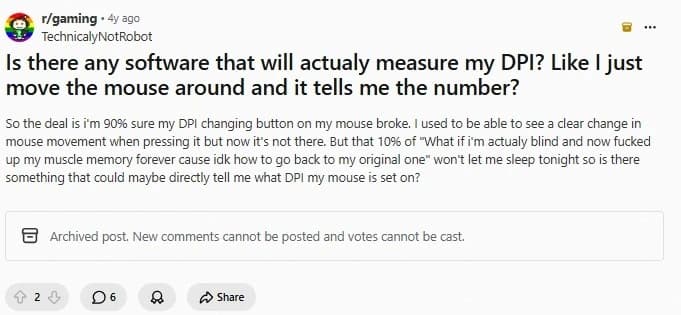
This is one of the most common and most overlooked realities of mouse hardware. One Reddit user posted this exact problem after suspecting their DPI button had broken; they could not tell whether their sensitivity had actually changed, or whether they had simply adjusted to a new setting. Without measuring, there is no way to know.
Several physical and firmware factors cause real DPI to deviate from the label:
Mouse pad surface texture: Cloth surfaces introduce micro-friction, causing the sensor to under-report slightly. Hard and glass surfaces track cleaner.
Sensor lift-off distance: The height your mouse lifts off the pad changes how the optical lens calculates movement. Thin skates can shift this around a bit, but measurably.
Firmware interpolation: Some mice add internal rounding or smoothing layers over the raw sensor data, meaning the effective count per inch is different.
OS acceleration (the biggest culprit): Windows “Enhance Pointer Precision” applies a variable speed multiplier to mouse movement, which means the DPI you read changes based on how fast you move your hand, making it impossible to measure accurately without disabling it first.
Real-world example:
A Logitech G Pro Wireless set to 400 DPI measured 425–430 DPI on a real mouse DPI analyzer, a 5–6% deviation. The same user’s G403 Wireless measured within 1% of 400 DPI. Both mice, same setting, meaningfully different real-world performance.
What Is the Best DPI for Gaming and Productivity?
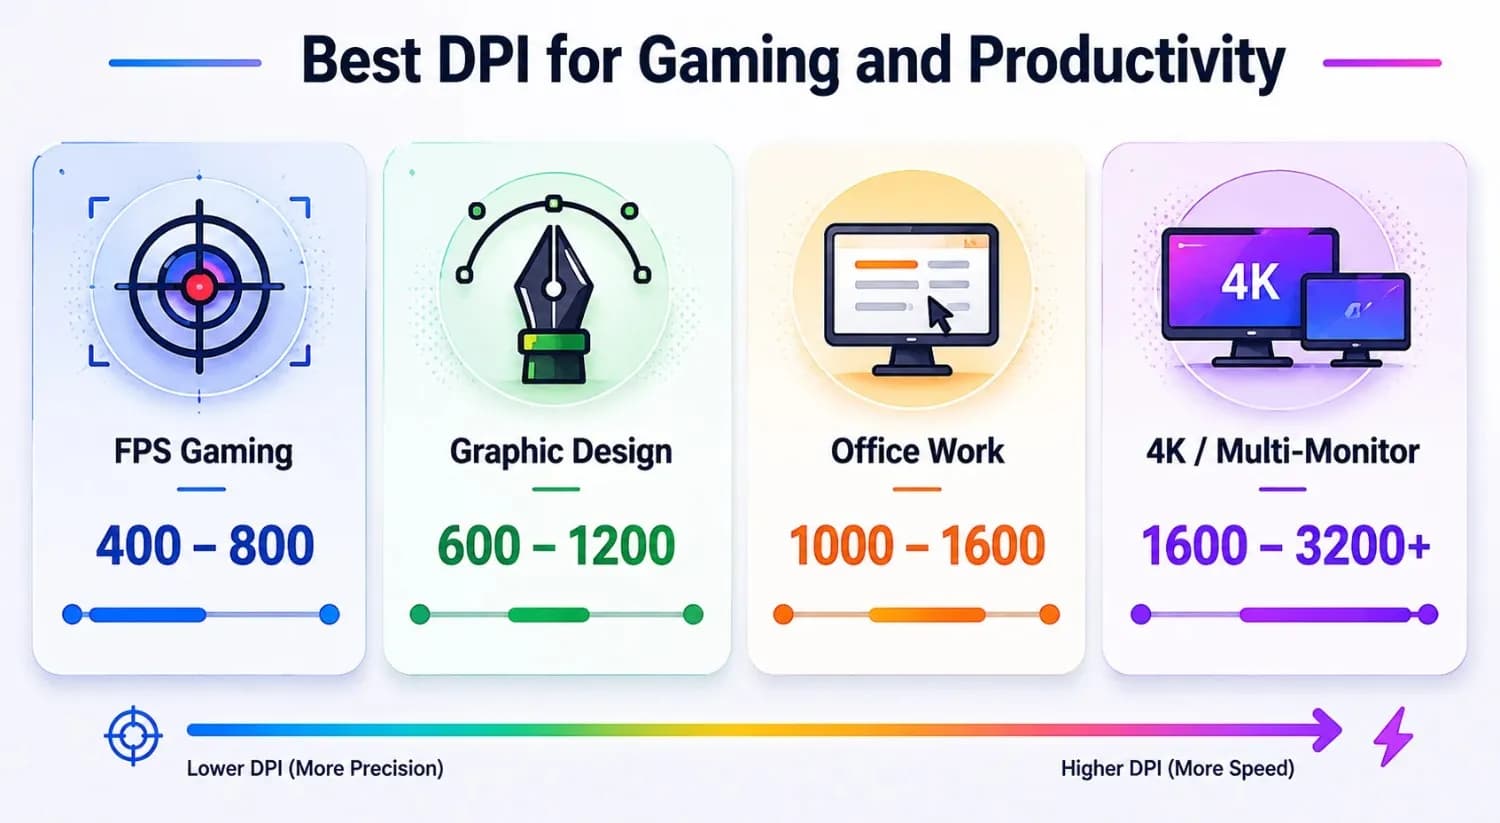
There’s no one “perfect” DPI that works for everyone; it really comes down to what you’re doing, your screen resolution, and what feels right to you. The table below gives you a solid place to start based on different activities. It’s been simplified to show how DPI affects cursor movement in each case.
| Use Case | Recommended DPI | Technical Function / Effect |
|---|---|---|
| FPS Gaming (Valorant, CS2, Apex) | 400 – 800 | Minimizes cursor movement per inch of physical movement for precise aiming. |
| MOBA & Strategy Games | 800 – 1600 | Increases cursor speed for fast map navigation and multi-unit management. |
| Graphic Design & Illustration | 600 – 1200 | Sets a steady cursor pace for precise brush strokes and vector pathing. |
| General Office / Productivity | 1000 – 1600 | Speeds up navigation between windows while retaining enough precision for small icons. |
| 4K / Multi-Monitor Setups | 1600 – 3200+ | Lowers the physical hand movement needed to travel across high pixel densities. |
Pro tip:
Most competitive FPS players, including Valorant and CS2 professionals, use 400 DPI combined with a low in-game sensitivity. This approach gives maximum control over individual pixels and is the standard in esports. Use our eDPI calculator to find your effective DPI once you have your real measured DPI.
What DPI Should I Use?
There is no global best DPI. The right number depends on your monitor resolution, play style, and the type of task you perform most. A lower DPI is more accurate for doing design projects. For gaming, the genre determines the range. For everyday browsing and productivity, comfort matters more than precision. Choose the DPI that matches your primary use case from the table above, then test your actual output with this tool to confirm your hardware is delivering what you configured.
DPI Analyzer for Valorant, CS2, and FPS Games
The DPI analyzer for Valorant users, and for CS2, Apex Legends, and any other FPS, serves one core purpose: confirming that your configured DPI matches your actual sensor output before translating it into an in-game sensitivity setting.
Here is why this matters in competitive play. Suppose you configure your mouse to 800 DPI, but your real measured output is 856 DPI. Then you set your in-game Valorant sensitivity to 0.35 and expect a certain cm per 360-degree turn. Because your real DPI is higher, your actual turn speed will be different from what you calculated, meaning your aim training, muscle memory, and sensitivity converter output are all built on an incorrect baseline.
Here’s the easy way to get it right: first, use this tool to measure your actual DPI. Plug that real number into your calculations, then run it through our sensitivity converter to match your aim perfectly across different games.
DPI Analyzer vs DPI Calculator: Key Differences
These two tools are frequently confused but serve entirely different purposes:
| Feature | DPI Analyzer (This Tool) | DPI Calculator |
|---|---|---|
| What it does | Measures your actual mouse DPI by tracking physical movement. | Calculates in-game sensitivity based on a known DPI number. |
| What you need to provide | A ruler and a steady hand, you’ll move your mouse a set distance. | Your existing DPI value and your current game sensitivity settings. |
| What you get | Your mouse’s real DPI, plus the percentage difference from what’s advertised. | A converted sensitivity value ready to use in another game. |
| Best for | Checking if your mouse hardware is accurate. | Transferring your muscle memory between different games. |
| When to use it | First, always measure your real DPI before anything else. | After you know your true DPI, then convert away. |
Think of it this way: the DPI analyzer is step one. Once you know your real number, the DPI calculator and sensitivity converter become accurate. Starting with the calculator and using an unverified DPI is like using a measuring tape without knowing if it stretches.
CPI vs DPI: The Technical Distinction
The industry uses the term DPI because it has widespread recognition and search volume, but the technically correct term for mouse sensors is CPI (Counts Per Inch). Here's the difference:
DPI (Dots Per Inch)
An original term from the print industry. It’s about how many ink dots a printer places per inch on paper. In this context, it is fixed and physical.
CPI (Counts Per Inch)
The correct hardware term for mice. It’s about how many individual coordinate updates (counts) the optical sensor reports to the operating system for every inch of physical movement. The higher the CPI, the finer the position data stream.
When you set your mouse to “800 DPI” in software like Logitech G Hub, Razer Synapse 3, SteelSeries GG, or Corsair iCUE, you are technically setting 800 CPI. The terms are interchangeable in consumer language but distinctly different in hardware engineering.
Common misconception to avoid:
Changing your mouse DPI (CPI) does not affect image quality, screen resolution, or pixel crispness whatsoever. Those are controlled by your monitor and GPU settings. Mouse DPI is purely about sensor update rate and cursor movement ratio.
Key Features of This DPI Analyzer Tool
Here are the features that make this online DPI analyzer tool trustworthy and easy to use for everyone:
100% Free and Instant
This tool is free of cost. There is no registration, no subscription, and no payment of any kind required. Simply open the DPI analyzer, run your test, and your real DPI result appears immediately. You can do a few tests at different DPI settings and compare them in one session.
No Downloads or Software Installation Needed
This is a fully browser-based application. No downloads, no extra drivers required. Check your mouse DPI on Windows, MacOS, Linux, Fedora, and even Chromebooks without installing or setting up anything.
Works on All Devices and Browsers
This tool has full support whether you're on a desktop, laptop or tablet. It works on all popular browsers, Chrome, Firefox, Brave, Safari, Opera GX, and Edge, so no matter what device or operating system you have, it won’t affect the performance or accuracy.
What Is This Tool Used For?
Many mice today either list their DPI on the packaging or include manufacturer software that displays a configured DPI value. However, that value is what the firmware targets, not what the sensor is physically delivering. This tool lets you verify whether your real output matches what is printed on the box or shown in your software. If you are not sure what DPI your mouse is running at, or if you want to confirm that a DPI button change actually registered, this is the fastest and most reliable way to find out.
Mouse DPI vs In-Game Sensitivity Explained
Mouse DPI is a measurement of how far your cursor will move on screen for every physical inch you move the mouse. In-game sensitivity is a different multiplier that is unique to each game’s engine. The combination of these two numbers gives you your eDPI, or Effective DPI, which is how fast your crosshair or cursor will move when gaming. Testing your hardware DPI with this tool first, then setting your in-game sensitivity, ensures both values are calibrated correctly, and your eDPI is intentional rather than accidental.
Common DPI Testing Mistakes to Avoid
Even with a reliable online DPI analyzer, user errors can produce inaccurate results. Avoid these:
Not Disabling Pointer Acceleration
This is the single most common cause of inconsistent readings. Windows “Enhance Pointer Precision” adjusts your cursor speed dynamically based on how fast you move. A browser-based tool receives OS-modified coordinate values, not raw sensor data, so the test measures the accelerated output, not true DPI. Always disable it before testing.
Moving the Mouse Too Quickly or Too Slowly
Move at a steady, controlled pace across your measured distance. Sudden acceleration at the start or end of the movement introduces human timing error. Use a solid physical guide (ruler edge, mouse box lid) rather than free-hand guessing.
Browser Zoom Not at 100%
If your browser is zoomed in or out (Ctrl+Scroll or Ctrl+/Ctrl−), the tool's coordinate scaling will not match the actual screen pixel grid. Ensure your browser zoom is set to 100% before running the test (reset with Ctrl+0).
Testing Only Once
Run the test at least three times and use the average. A single test can capture micro-errors from hand movement. Three consistent readings averaging to the same range give you a reliable result.
Using the Wrong Software Specs as Reference
Be aware that some outdated guides still reference Corsair Utility Engine (CUE), a platform that has been replaced by Corsair iCUE. Similarly, Logitech's modern gaming software is G Hub (not the legacy LGS). Using outdated software may mean your configured DPI setting is not being applied correctly, which affects what you are measuring.
Conclusion
This DPI analyzer gives you one thing every mouse user needs before optimizing their setup: the truth. Not the number on the box, not the value in your mouse software, the actual DPI your sensor is delivering right now, measured from real physical movement.
Whether you are calibrating a DPI analyzer for Valorant lineups, verifying your HP mouse DPI after changing profiles, diagnosing a broken sensitivity button, or just making sure your real mouse DPI analyzer reading matches your game settings, this tool handles it in under 60 seconds with no download required.
Once you have your real DPI reading, the number has no value sitting idle. Plug it into your game settings, verify it against your aim trainer baselines, or use it to correct a sensitivity that has felt subtly off for months. That single accurate measurement changes everything downstream.
Know Your Real DPI in Under 60 Seconds
Measure My DPI NowFrequently Asked Questions
A DPI analyzer is an online tool that measures your mouse's actual dots per inch by tracking how many screen pixels your cursor travels when you physically move your mouse a set distance. It gives you the real hardware output rather than the value advertised on the packaging.
Yes. This online DPI analyzer is completely free to use. No registration, no account, and no DPI analyzer download required. It runs entirely in your browser.
Yes, this DPI analyzer tool works on macOS in all major browsers, Chrome, Firefox, Safari, and Edge. macOS users should note that the system applies an aggressive acceleration curve by default. For the most accurate result, adjust tracking speed in System Preferences or use a utility like LinearMouse to achieve 1:1 raw tracking before testing.
Yes. This tool is based on universal web standards and can be used correctly on Chrome, Firefox, Brave, Opera GX, Safari, and Edge. It does not depend on Chrome-specific features.
Factory DPIs are targets, not guarantees. Sensor variance, mouse pad surface, firmware interpolation, and lift-off distance all affect real-world output. A ±5% deviation is normal for most gaming mice. A deviation larger than 8–10% is worth correcting, either by adjusting the configured DPI in your mouse software or compensating with in-game sensitivity settings.
DPI is your hardware mouse sensitivity. eDPI or Effective DPI is your DPI times your in-game sensitivity setting. Example: 800 DPI x 0.4 in-game sensitivity = 320 eDPI. This combined figure is what determines your actual in-game cursor movement speed.
Use this tool to find out your real DPI with pointer acceleration turned off and write down the exact output. When you calculate your eDPI or convert sens between games, use this real number instead of the configured number. This way, your sensor settings in the game are based on the real hardware behavior, not on the manufacturer's estimates.
Yes. Cloth mouse pads add surface friction, which can cause the sensor to slightly under-report. Hard and glass surfaces track cleaner. This is one of the reasons for taking multiple tests and averaging them instead of a single measurement.
With pointer acceleration disabled and a physical ruler used for distance measurement, this tool is very accurate, generally within 1-2% of your true DPI. The main sources of error are human inconsistency of movement and acceleration at the OS level. Taking 3-5 tests and averaging the results minimizes both.