How to Change DPI on a Mouse: Full Setup Guide
By DPI Analyzer TeamPublished Updated
Changing your mouse DPI is one of the quickest ways to make your setup feel completely different, but a lot of people either do not know it is possible, or they change it the wrong way and wonder why nothing feels right. This guide walks you through every method: software, hardware buttons, and Windows settings. We will also cover what actually changes when you adjust DPI, because doing it blindly rarely gets you where you want to be.
Once you have changed it, run a quick test with our DPI Analyzer to confirm your sensor is hitting the number you set, not just the number the software shows.
What Actually Happens When You Change DPI
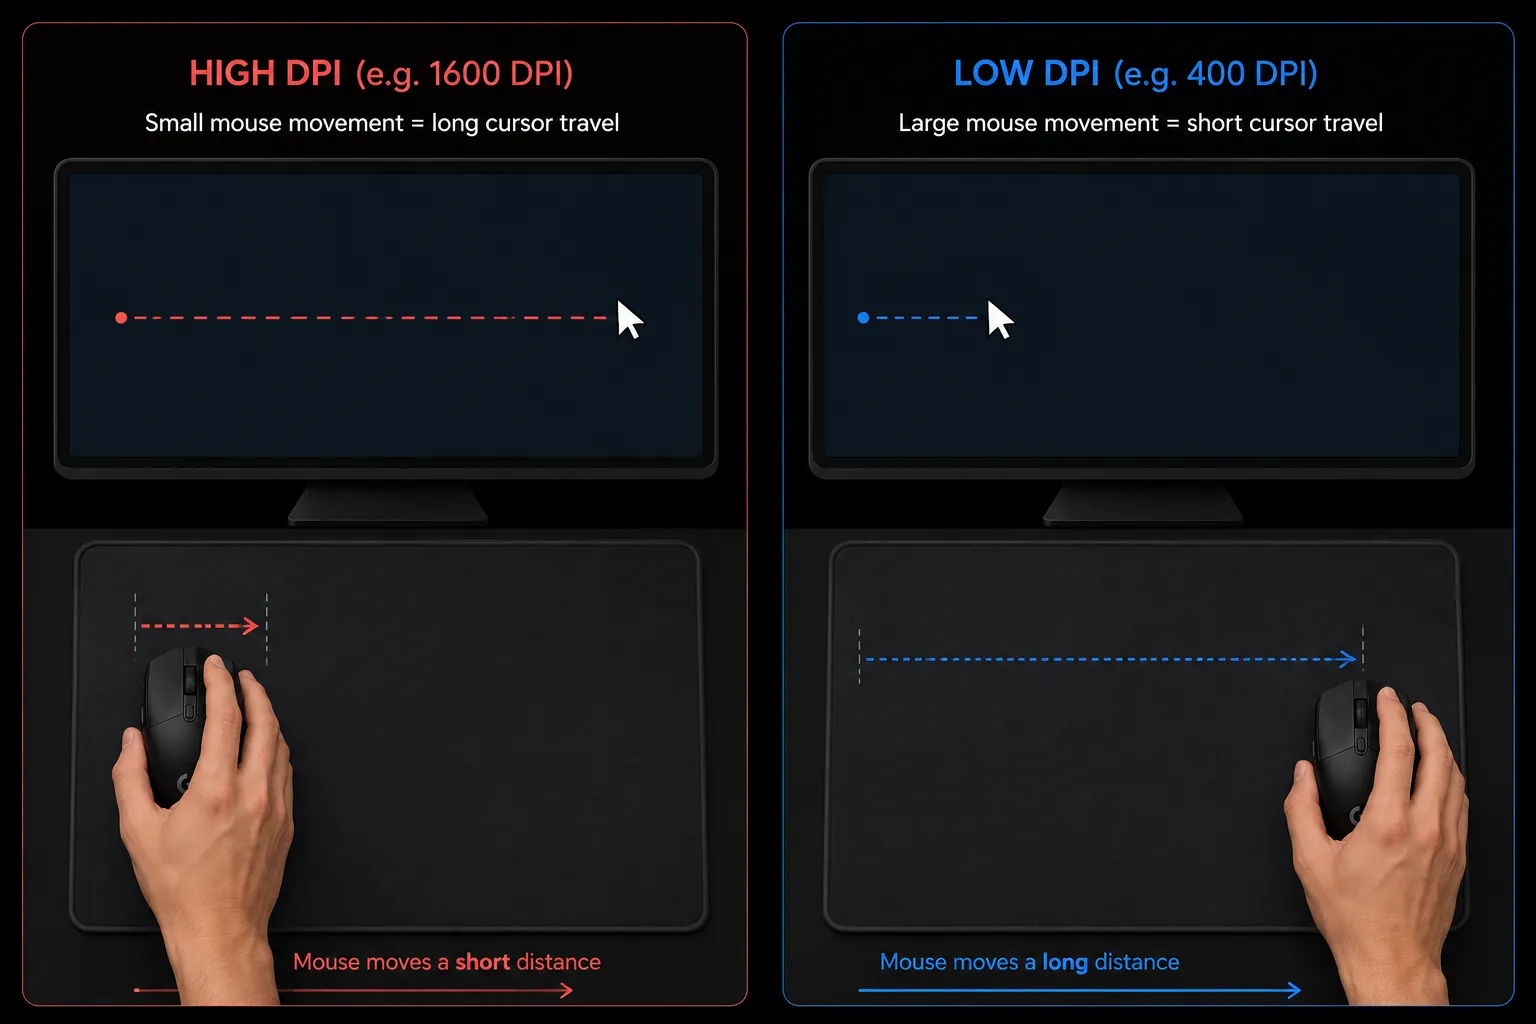
DPI stands for Dots Per Inch. It measures how far your cursor travels on screen for every inch your mouse physically moves on a surface. Set it higher, and your cursor covers more ground with less hand movement. Set it lower, and every small physical movement produces a smaller, more controlled cursor movement.
People change their DPI for a few different reasons. Gamers drop it low for more precise aiming. Designers raise it for faster navigation across multiple monitors. Some people just feel like their mouse is too fast or too slow and do not realize that DPI is the place to fix that, rather than in-game sensitivity or the Windows pointer slider.
One thing worth knowing before you start: changing DPI at the hardware level is different from changing the in-game sensitivity slider. They produce a similar feeling result but are technically separate. DPI is the sensor output. In-game sensitivity is a multiplier applied on top of that output. Changing one and not the other is fine, but understanding both helps you dial things in more precisely.
Method 1: Change DPI Using Mouse Manufacturer Software
If you have a branded gaming mouse, software is the cleanest way to change the DPI. You can set exact values, save multiple profiles, and adjust DPI per-game if you want. Here is how it works for the most common brands.
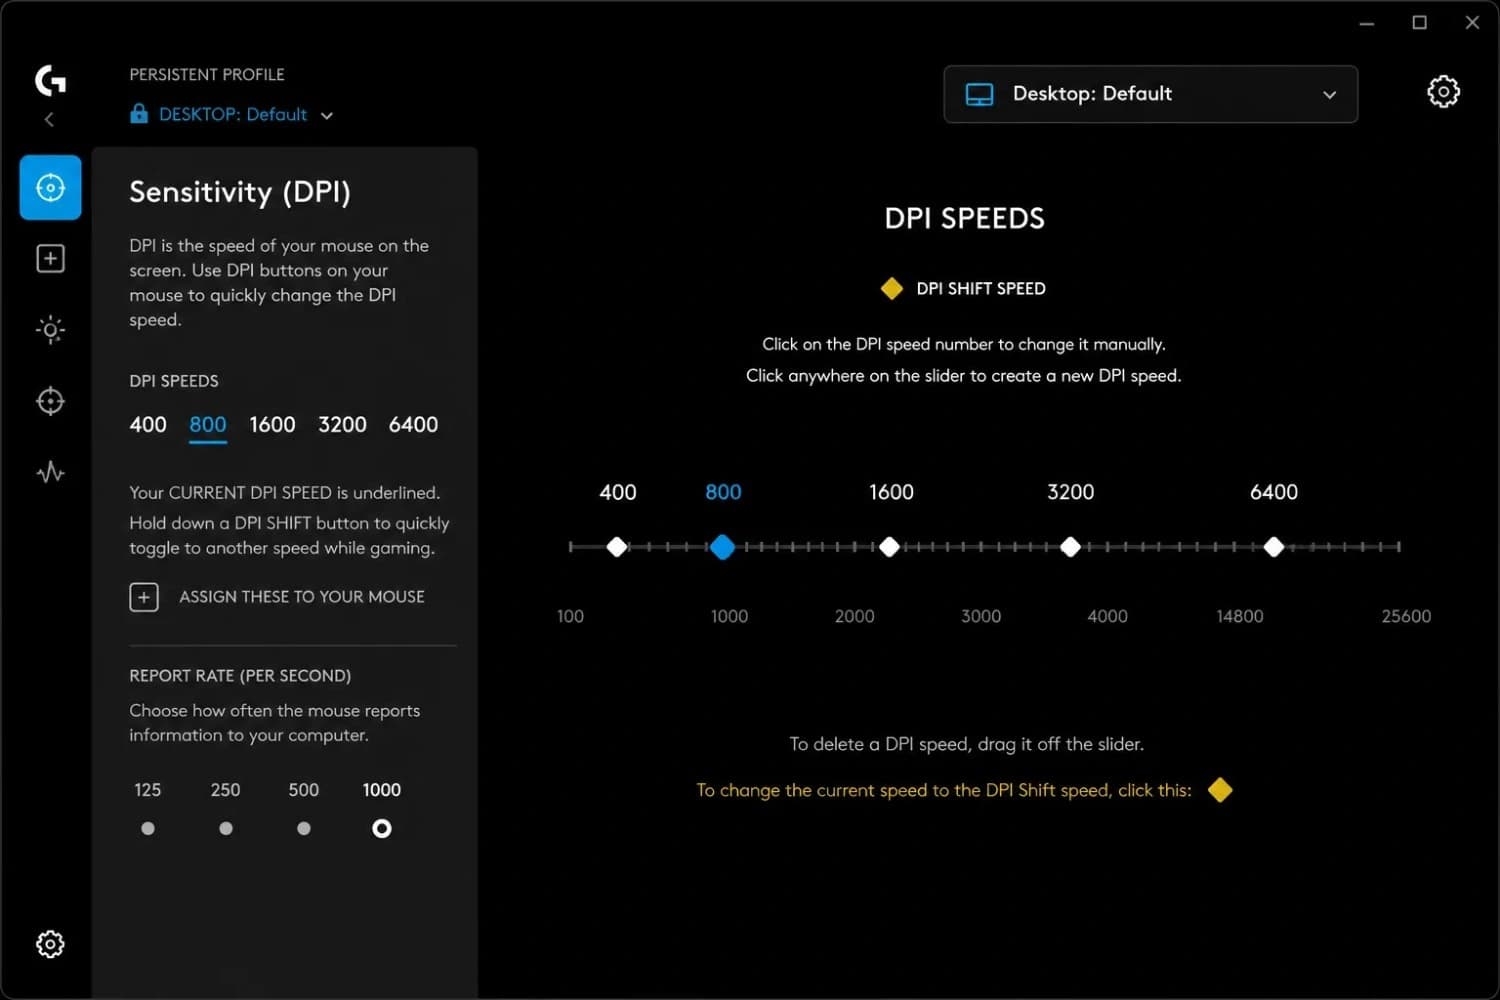
Logitech: G Hub
- Open Logitech G Hub on your PC.
- Click your mouse in the device list on the home screen.
- Select the Pointer section from the left navigation.
- You will see your DPI listed with any stored presets. Click the value to adjust it, or drag the slider to your target number.
- Click Save. G Hub updates the mouse firmware with the new value instantly.
G Hub lets you store up to five DPI stages and toggle between them using the DPI button on the mouse. If you want specific presets like 400, 800, and 1600, set each one individually in the profile.
Razer: Synapse 3
- Open Razer Synapse 3.
- Click your mouse on the device panel at the top.
- Go to Performance.
- You will see a DPI slider and a numerical input. Razer mice increment DPI in steps of 50, so you can get exact values like 450 or 850 rather than being locked to round numbers.
- Click Apply to save the setting to the mouse.
SteelSeries: GG Software
- Open SteelSeries GG.
- Select your mouse from the connected devices list.
- Navigate to the Sensitivity or CPI section depending on your model.
- Adjust the value and save. SteelSeries uses the term CPI rather than DPI; they mean the same thing for everyday use.
Corsair: iCUE
- Open Corsair iCUE.
- Click your mouse in the device panel.
- Go to the DPI section from the left sidebar.
- Click a DPI stage to edit it, set the value, and click Save Profile.
Note:
HyperX: NGENUITY
- Open HyperX NGENUITY.
- Select your mouse.
- Find the DPI settings panel and adjust to your preferred value.
- Save changes to the mouse's onboard memory.
Method 2: Use the DPI Button on Your Mouse
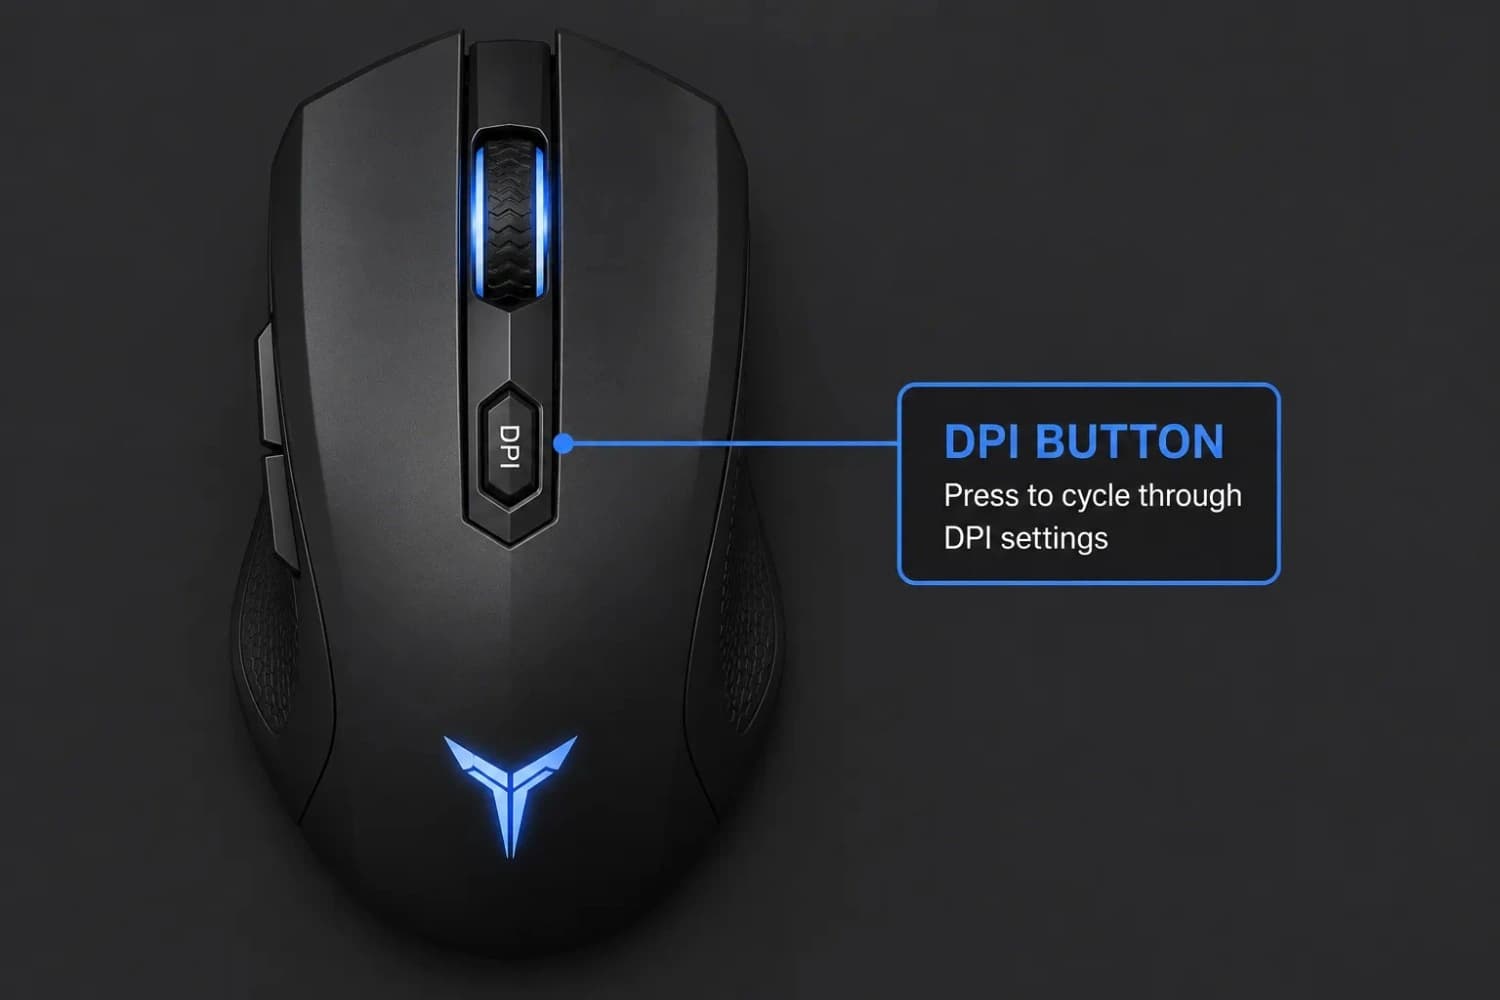
Most gaming mice have a physical DPI button, usually located just below the scroll wheel or on the side of the mouse body. Press it once, and your mouse shifts to the next DPI stage in its preset list. Press it again, and it steps to the next one. It cycles through however many stages you have configured in the software.
If you have not set up your software yet, your mouse is cycling through the factory default presets. For most gaming mice, these are 400, 800, 1600, and 3200, though this varies by model.
Some mice have two separate DPI buttons, one to go up, one to go down. Others use a single toggle button. A few budget mice have fixed DPI stages with no software control at all, so the button is the only way to change it. If a single press ever seems to register twice or skip a stage, run a quick double click test to rule out a faulty switch before blaming the software.
How to Know Which Stage You Are On
Many mice use LED indicators near the DPI button to show the active stage, with different colours for different stages, or several lit dots. Check your mouse manual or the manufacturer's product page to see what each indicator means for your specific model. If the indicators are not clear, open your manufacturer software while pressing the button and watch the DPI value update in real time.
Method 3: Windows Mouse Settings (What It Can and Cannot Do)
This is where a lot of people go wrong. Windows does not let you change your mouse's DPI directly. That number lives at the hardware and firmware level, not the operating system level. What Windows does have is a Pointer Speed slider and a Pointer Precision toggle, and these are not the same thing as DPI, even though they produce a similar effect.
To find these settings: go to Start, then Settings, then Bluetooth and Devices, then Mouse, then Additional Mouse Settings. Click the Pointer Options tab.
Pointer Speed Slider
The slider runs from 1 to 11 notches. The middle position (notch 6) is the neutral setting; it applies no scaling to your sensor output. Moving it above 6 makes Windows amplify your cursor movement. Below 6 and Windows reduces it. This is not changing your DPI. It is adding a software layer on top of it.
For most everyday users, this slider is fine to use. For competitive gaming or precise design work, it is better to leave this at the centre and adjust the DPI at the hardware level instead.
Enhance Pointer Precision: Turn This Off Before Testing
The checkbox labelled Enhance Pointer Precision is Windows pointer acceleration. When it is on, your cursor moves faster when you move the mouse quickly and slower when you move it slowly. This makes your effective sensitivity inconsistent; two identical physical movements produce different cursor distances depending on how fast you make them.
Turn this off if you are trying to test, measure, or calibrate your DPI. Leave it off permanently if you are gaming. It is one of the most common culprits behind unpredictable sensitivity, even after you have set everything correctly.
How to Verify Your DPI Actually Changed
Mouse software shows your configured DPI, the value the firmware is targeting. It does not show your measured DPI or what the sensor is actually doing. Sensor variance, mouse pad texture, and firmware interpolation can shift your real output by 5 to 10 percent from the target value.
That gap usually does not matter for casual use. But if you are trying to match a specific eDPI, transfer sensitivity from one game to another, or set up an aim trainer with precise numbers, you want the measured value, not the configured one.
To get your real DPI, use a browser-based test. Set a physical distance with a ruler, move your mouse exactly that distance inside the tool, and read the pixel output. Our DPI Analyzer does this directly in your browser in under a minute, with no download or install required. If you would rather skip the browser step for now, you can also check your mouse DPI without an analyzer using ruler measurements or manufacturer software.
If your measured DPI reads 812 when your software says 800, that is a 1.5 percent deviation, normal and acceptable. If it reads 430 when you set 400, that six percent gap is worth knowing about before you start building settings around it.
What DPI Should You Actually Use
There is no single right answer, but there are reliable starting points based on use case and screen size. For a deeper breakdown by scenario, see our DPI recommendations for every screen and play style.
| Use Case | Suggested DPI | Why |
|---|---|---|
| FPS Gaming (CS2, Valorant) | 400 – 800 | Low DPI gives more physical distance per pixel, and small corrections are more forgiving |
| MOBA / Strategy Games | 800 – 1600 | A faster cursor helps with multi-unit control and map navigation |
| Graphic Design / Illustration | 600 – 1200 | Balance between speed and fine control for precision work |
| General Office / Productivity | 1000 – 1600 | Fast enough for large screens without overshooting targets |
| 4K / Multi-Monitor Setup | 1600 – 3200 | Higher DPI prevents having to drag across a large desk just to reach the other screen |
If you are gaming competitively and want to understand how your hardware DPI feeds into your effective sensitivity across different games, the Valorant to CS2 sensitivity converter on RTings is a solid external reference for cross-game sensitivity math.
Common Mistakes When Changing DPI
Changing Windows Display Scale and Calling It DPI
Windows has a Display Scale setting. Go to Settings, select System, and then click Display. It is labelled as a percentage and affects how large text and UI elements appear on screen. Some guides incorrectly tell people to change this to adjust their mouse DPI. It does not affect sensor output whatsoever. If you follow that advice, your cursor speed might feel slightly different because UI elements are now a different size relative to your screen, but your hardware DPI has not changed at all.
Changing DPI and In-Game Sensitivity at the Same Time
If you raise your DPI and lower your in-game sensitivity by the same proportion, your cursor feel should theoretically stay the same. But most people do not do the math precisely, and the result is that they end up somewhere they did not intend. If you are experimenting, change one at a time. Adjust DPI, play for a session, then decide if the in-game sensitivity still needs a touch. If the math is getting confusing, a mouse sensitivity converter can handle the proportion for you instead of guessing.
Not Disabling Pointer Acceleration Before Testing
If Windows Enhanced Pointer Precision is active, your effective sensitivity varies with how fast you move the mouse. This means any DPI value you set will feel inconsistent — and any measurement you try to take will be inaccurate. Disable it before you test, and ideally before you game seriously on any setting. For more on why this step matters, see our breakdown of how accurate a DPI analyzer actually is.
Changing Mouse DPI on a Mac
The process on a Mac depends on whether your mouse software supports macOS. Logitech G Hub, Razer Synapse, and SteelSeries GG all have Mac versions. Download the macOS version from the manufacturer's site, connect your mouse, and the DPI settings work identically to the Windows version.
If you do not have manufacturer software or your mouse is not officially supported on macOS, the DPI button on the mouse itself still works; it cycles through hardware presets regardless of OS.
One thing Mac adds is its own acceleration layer. macOS applies mouse acceleration by default, which behaves differently from Windows pointer precision. For a cleaner experience when gaming or testing on Mac, consider using LinearMouse, a free utility that disables Apple's acceleration and gives you consistent 1:1 tracking. For a full walkthrough of testing and calibrating on macOS, the DPI Analyzer on Mac guide covers the preparation steps in detail.
Conclusion
Changing your mouse DPI takes about two minutes once you know where to go. Use your manufacturer's software for precise control and saved profiles. Use the DPI button for quick on-the-fly switching. Stay away from Windows display settings; they do not change hardware DPI at all.
Whatever method you use, the last step is worth doing: measure the result. Firmware targets and real sensor output are not always the same. Our DPI Analyzer gives you the measured number in under a minute, straight from your browser. Build your sensitivity settings around a number you have actually confirmed.
Related Tools and Guides
- DPI AnalyzerMeasure the DPI your mouse sensor actually delivers, using nothing but a ruler and your browser.
- DPI Recommendations for Every ScreenThe right DPI for every screen size and resolution — from 1080p to 4K and multi-monitor setups, with pro references.
- How to Check Mouse DPI Without a DPI AnalyzerUse manufacturer software, Windows settings, or a quick ruler method to find your exact sensitivity — no analyzer required.
- eDPI CalculatorMultiply DPI by in-game sensitivity and see where your eDPI sits against the competitive range for your game.
Check your real DPI after changing it
Open the DPI AnalyzerFrequently Asked Questions
Yes. If your mouse has a physical DPI button, press it to cycle through hardware presets. This works even with no software installed. You will not be able to customise the preset values without software, but you can switch between whatever presets the manufacturer programmed at the factory.
Not directly. Higher DPI means more cursor travel per inch of mouse movement, which is faster, but not more accurate. For most gaming use cases, lower DPI with a comfortable in-game sensitivity gives more predictable aim. Higher DPI is useful for large monitors, 4K screens, or workflows where speed matters more than precision.
If your mouse has no DPI button and is not supported by any manufacturer's software, your DPI is likely fixed at a single value. Check the product page or the sticker on the bottom of the mouse for the rated DPI. Some entry-level mice are single-stage only and cannot be adjusted.
Mouse software shows the configured target, not the measured output. To check what your sensor is actually doing, use a physical measurement method. Our DPI Analyzer measures your real pixel output against a known physical distance directly in the browser.
For gaming, 400 DPI is a widely used choice among competitive players; it is not too low at all. For office work on a large monitor, 400 DPI can feel slow because you need a longer physical stroke to reach the other side of the screen. Most everyday users are comfortable somewhere between 800 and 1600 DPI for productivity.